How to RDP into a Mac: Install, Set Up, and Connect with Remote Desktop Protocol
macOS doesn't ship with an RDP server, but it's easy to add one and connect to your Mac using Remote Desktop Protocol. Here's how to install RDP on macOS, set it up, and connect from Windows, another Mac, or Linux.
If you’ve ever used RDP on Windows with the Remote Desktop Connection app or Windows App, you know how easy it is. Flip a switch in Settings, type a hostname into your RDP client on another PC, and you’re in. So it’s natural to expect the same thing on a Mac. Then you go looking for the switch in System Settings and find out it isn’t there.
This guide walks through why that is, and then how to get real RDP running on your Mac: installing an RDP server, setting it up, and connecting to it from Windows, another Mac, or Linux. By the end, connecting to your Mac should feel just like connecting to a Windows PC.
Does macOS have a built-in RDP server?
No. macOS does not include an RDP server, and there’s no setting in System Settings that turns one on. Apple has never shipped support for Microsoft’s Remote Desktop Protocol, so out of the box, nothing on your Mac allows you to connect using your RDP client.
That’s why pointing Remote Desktop Connection at a Mac fails with a generic “can’t connect to the remote computer” error. There’s simply nothing on the other end that speaks RDP.
Isn’t macOS Screen Sharing the same as RDP?
Not quite. macOS does have a built-in remote access feature called Screen Sharing, which you can turn on under System Settings › General › Sharing. But Screen Sharing uses VNC, a completely different protocol from RDP. Windows’ Remote Desktop clients can’t connect to it, and VNC clients that can connect often struggle with Apple’s authentication and extensions.
VNC also works very differently under the hood. It sends changed rectangles of pixels instead of hardware-encoded video, the resolution is stuck at whatever the Mac’s screen is, and there’s no audio. If you want the full breakdown, I covered it in RDP vs. VNC.
What about Microsoft Remote Desktop for Mac?
This one trips a lot of people up. Microsoft’s Windows App (previously called Microsoft Remote Desktop) is available in the Mac App Store, but it’s an RDP client. It lets you connect from your Mac to a Windows PC. It doesn’t let anything connect to your Mac.
To RDP into a Mac, you need an RDP server running on the Mac itself. That’s the piece macOS is missing.
How to install an RDP server on macOS
To add an RDP server to your Mac, you need a third-party app. ProRDP is a great option: it’s built natively for macOS and uses the Mac’s hardware encoders and Apple silicon, so it is extremely fast and smooth. Any standard Remote Desktop client, including the one built into Windows, can connect to your Mac without installing anything extra on the client side. It’s free for home and personal use, with no account or sign-up required.
What do you need to RDP into a Mac?
Before you start, make sure you have:
- A Mac running macOS 15 Sequoia or later. Both Apple silicon and Intel Macs are supported.
- A Remote Desktop client on the device you’re connecting from. Remote Desktop Connection (
mstsc) is already built into Windows. Windows App works on Windows, macOS, Android, and iOS. FreeRDP also works on Windows, macOS, and Linux. - Both devices on the same network, or connected through a VPN. More on that below.
The full list of supported clients and network requirements is in the system requirements.
How to download and install ProRDP
- Download the latest release of ProRDP.
- Open the downloaded DMG file and drag ProRDP into your Applications folder.
- Open ProRDP from Applications or Spotlight.
ProRDP lives in your menu bar and opens its settings window the first time you launch it.
How to grant Screen Recording and Accessibility permissions
macOS protects your screen and input behind privacy permissions, so an RDP server needs two of them before it can work:
- Screen Recording lets ProRDP capture your screen (and system audio) to send to the client.
- Accessibility lets ProRDP pass the client’s keyboard and mouse input into macOS.
When either one is missing, ProRDP shows a Grant button for it at the top of the General pane. Click it, and ProRDP opens the right page of System Settings › Privacy & Security so you can switch ProRDP on.
Once both are granted, quit and reopen ProRDP. macOS applies some permissions only when an app next launches, and skipping this step is the most common reason for a black screen on your first connection.
How to set up RDP on macOS
With ProRDP installed and the permissions granted, there are only a couple of things to set up before your Mac is ready to accept Remote Desktop connections.
How to set a username and password for Remote Desktop
Open the Account pane. This is where you choose the single username and password a Remote Desktop client has to enter to connect. You have two options:
- ProRDP account (default): a username and password used only for remote sessions. If it ever leaks, it can’t be used to log in at the Mac itself, unlock your keychain, or unlock FileVault. This is what I recommend for most people.
- macOS account: sign in with an existing Mac user’s own username and password, so there’s only one password to remember.
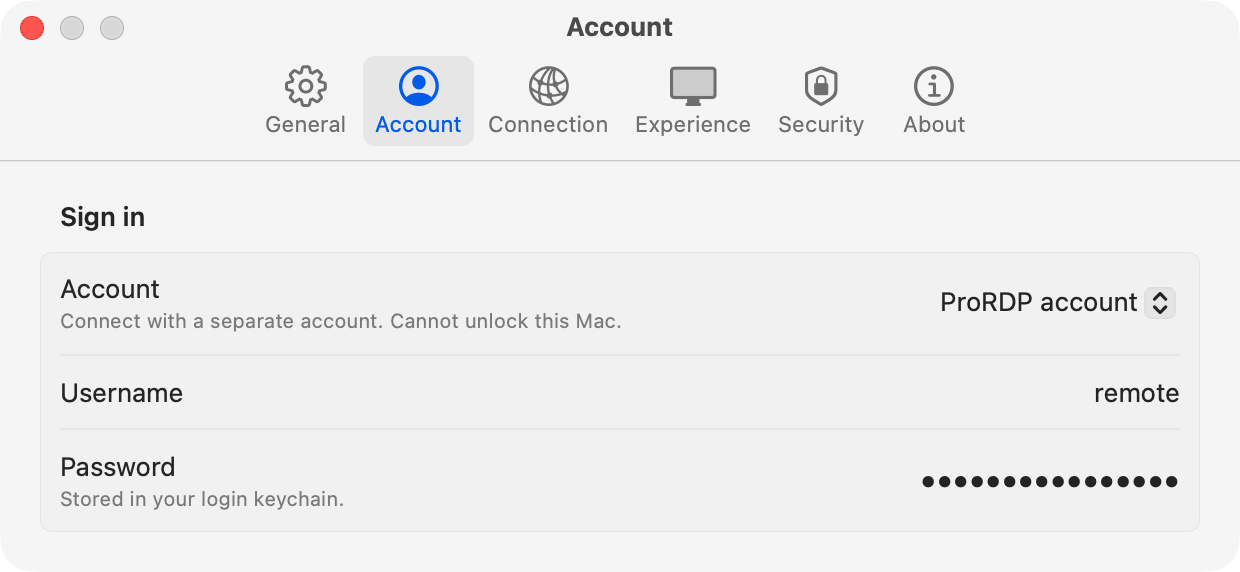
For a ProRDP account, enter a username and a strong password. The server won’t start until a password is set, so nobody can connect to a Mac with an empty one. The Account docs go into the security trade-offs of each option in more detail.
How to start the RDP server on your Mac
Go back to the General pane and click Start. The status changes from Stopped to Listening on followed by your Mac’s address and port. That address is what you’ll type into your Remote Desktop client, and you can select and copy it straight from this pane.
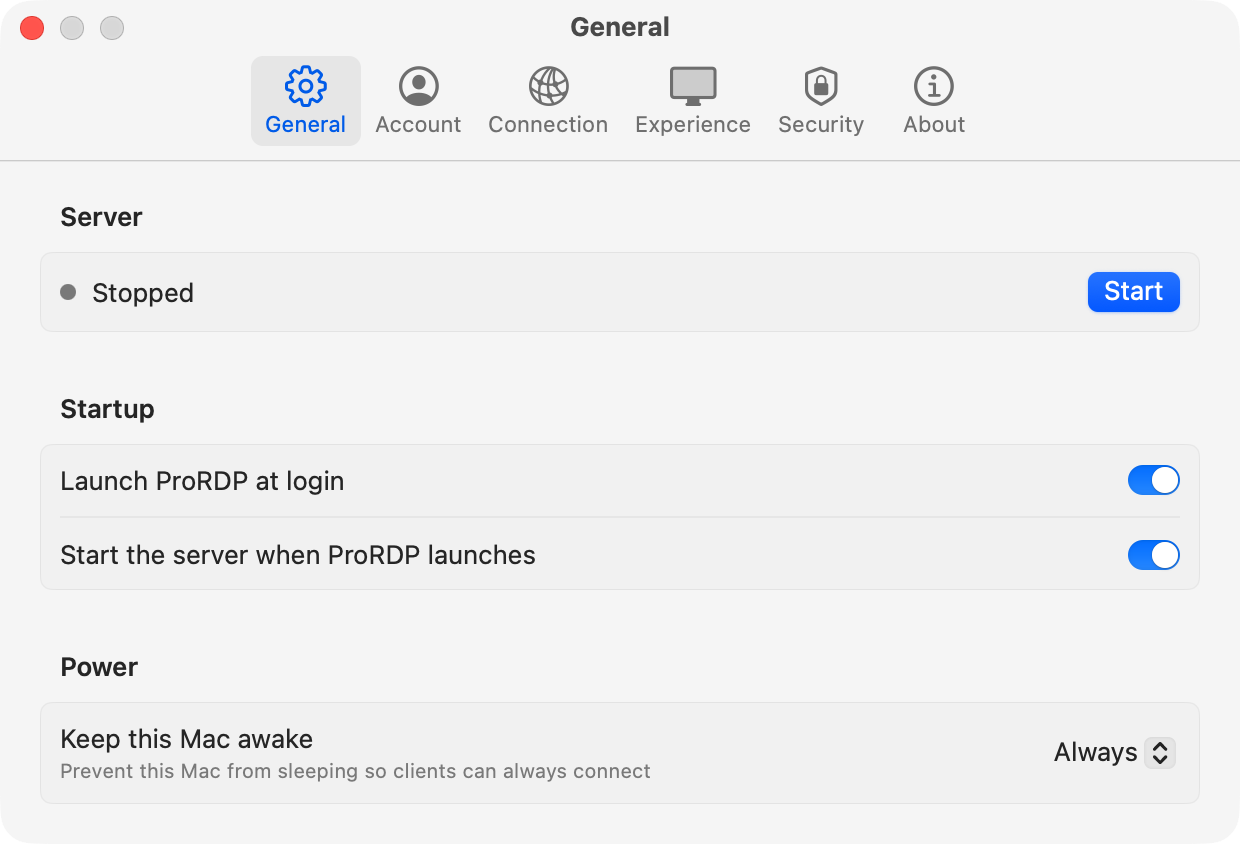
While you’re here, it’s worth checking the other settings on this pane:
- Launch ProRDP at login and Start the server when ProRDP launches: turn both on, and your Mac will be reachable again after a restart without you having to touch it.
- Keep this Mac awake: a sleeping Mac drops off the network, and an incoming RDP connection can’t wake it up. The default, Always, keeps the Mac from idling into sleep while the server is running.
How to choose what the remote session shows
This is the one place where RDP on a Mac works a little differently than on Windows, so it’s worth a minute. In the Experience pane, Mode decides how a remote session relates to your Mac’s own screens:
- Control: works like connecting to a Windows PC. Every open window moves into your session, and the Mac’s own screens go black so nobody nearby can see what you’re doing. They come back as soon as you disconnect.
- Extend: the session gets its own virtual display, sized to exactly match your client window. Someone can keep using the Mac in person while you work remotely, and resizing your client window resizes the desktop with it.
- Mirror: shows one of the Mac’s physical screens exactly as it is, which is what you want when you’re helping someone sitting at the Mac.
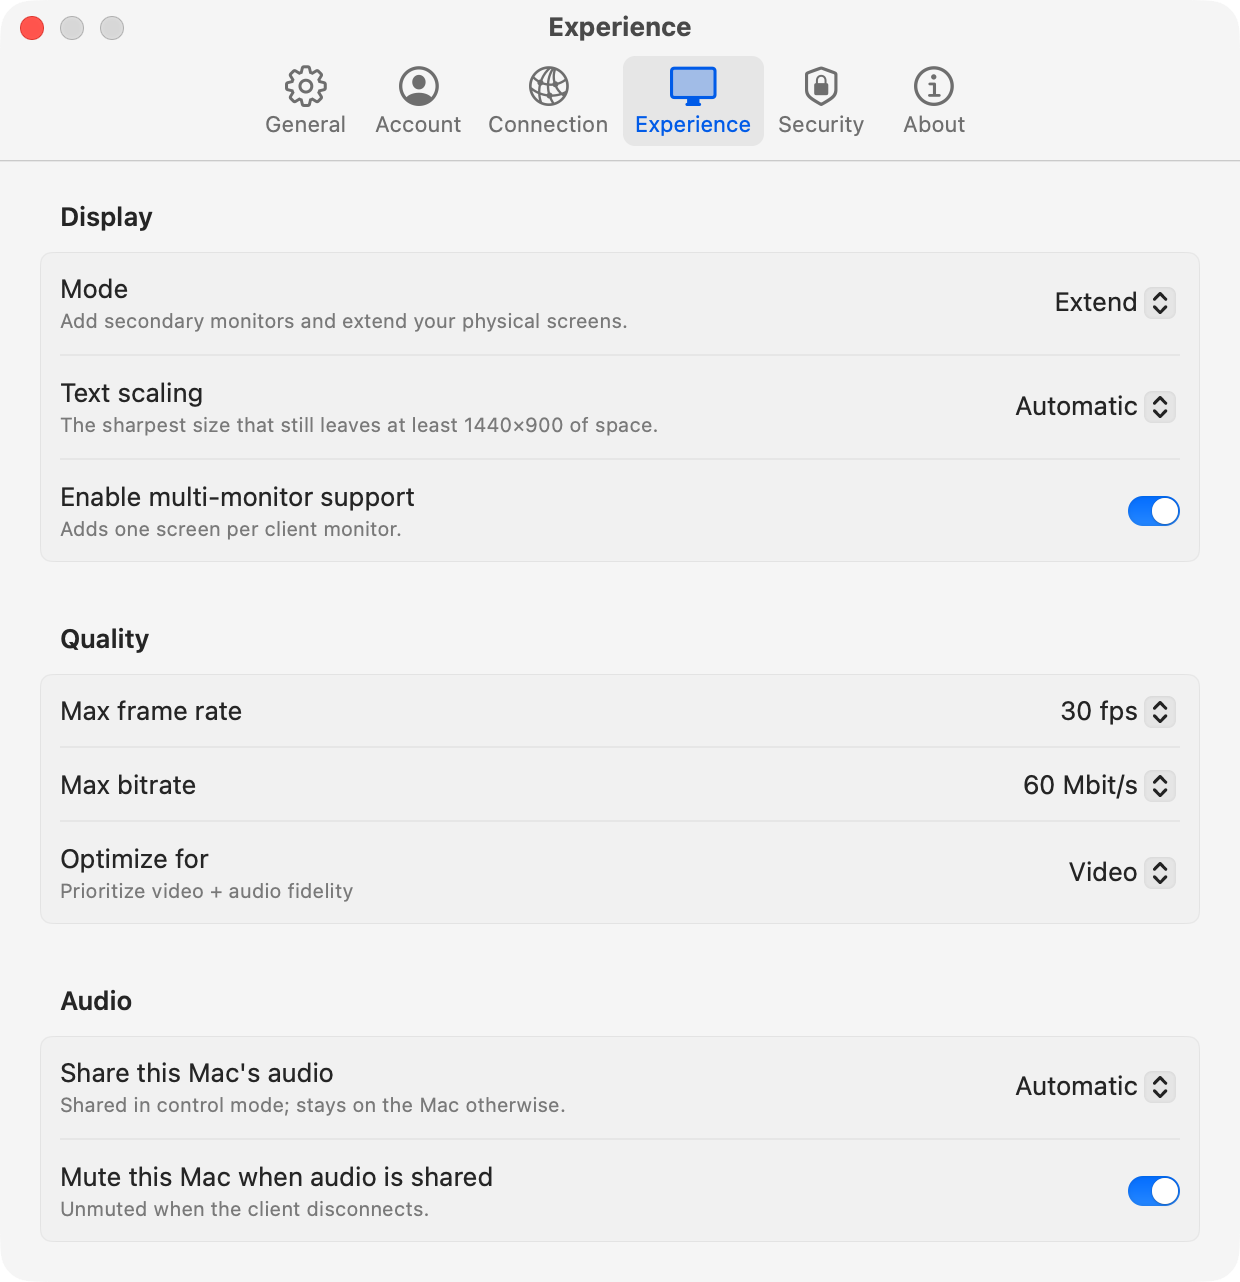
The same pane controls frame rate, bitrate, multi-monitor support, and where audio plays. The defaults are a good starting point for most networks, and the Experience docs explain when to change them.
How to RDP into a Mac
Your Mac is now running an RDP server, so connecting to it works just like connecting to any Windows PC.
How to find your Mac’s IP address or hostname for Remote Desktop
The easiest way is to look at the General pane in ProRDP. While the server is running, it shows the exact address to use next to Listening on.
You can also use your Mac’s local hostname, which you’ll find under System Settings › General › Sharing, at the bottom of the page under Local hostname. It looks something like mac-mini.local. A hostname is handy because it keeps working even if your router hands the Mac a new IP address.
How to RDP into a Mac from Windows
Windows already includes everything you need:
- Press Windows + R, type
mstsc, and press Enter to open Remote Desktop Connection. - In Computer, enter your Mac’s address or hostname, like
mac-mini.local. - Click Connect, then enter the username and password you set up in ProRDP.
- The first time you connect, Windows warns that the identity of the remote computer can’t be verified. That’s expected, because ProRDP creates its own self-signed certificate. Check Don’t ask me again for connections to this computer and click Yes.
And that’s it: you’re looking at your Mac from Windows:
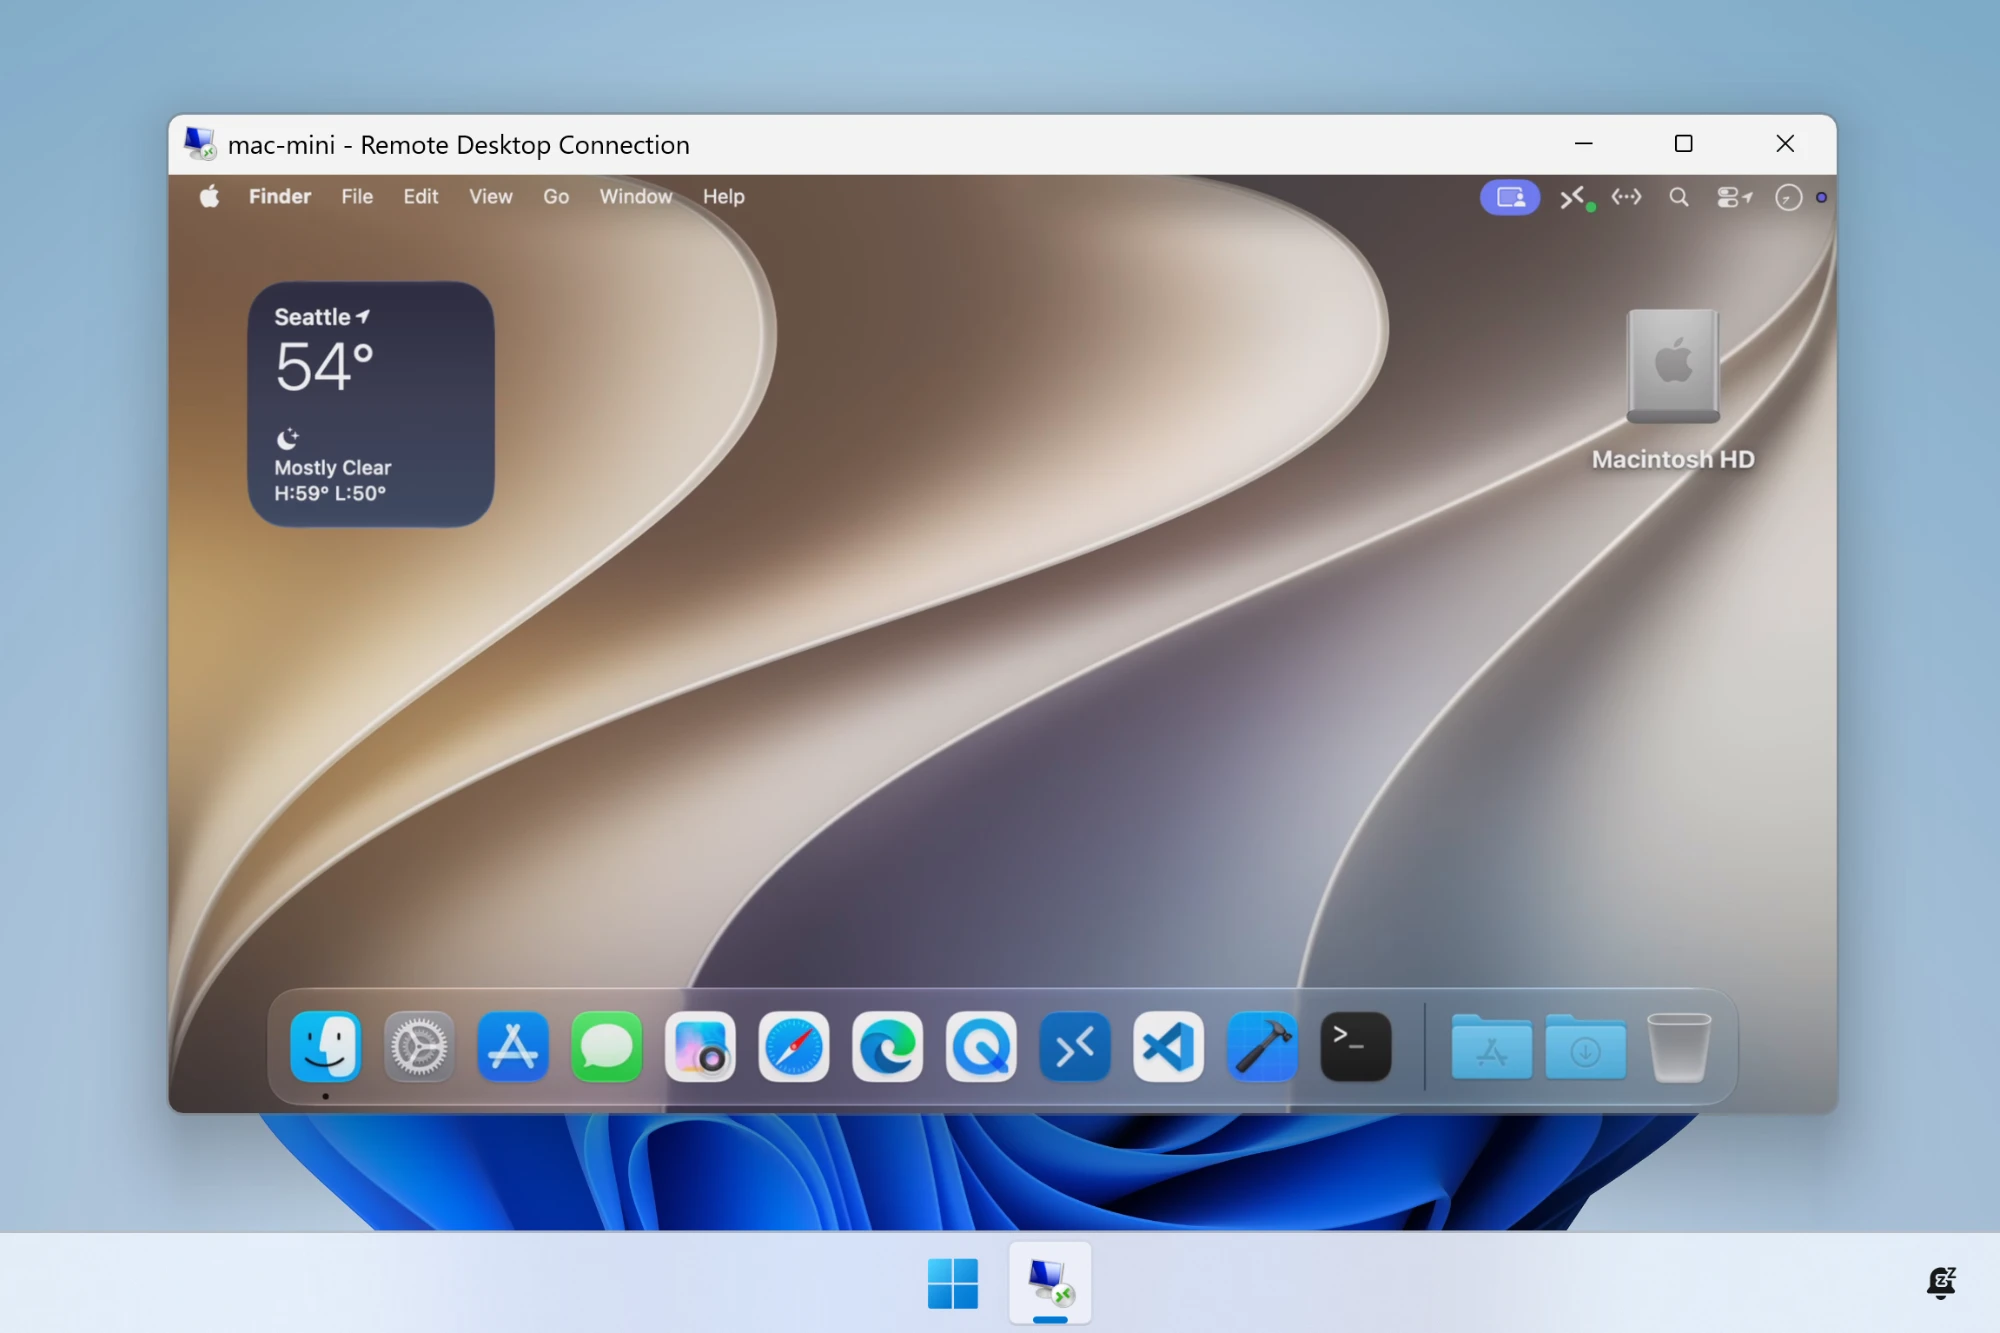
A few options in Show Options are worth knowing about:
- Display › Use all my monitors spans the session across every monitor on your PC.
- Local Resources › Remote audio needs to be set to play on this computer if you want to hear your Mac’s audio.
- Local Resources › Keyboard controls whether shortcuts like Alt+Tab go to the Mac or stay on Windows.
How to RDP into a Mac from another Mac
- Install Windows App from the Mac App Store.
- Click + and choose Add PC.
- Enter the Mac’s address or hostname in PC name, and optionally save your credentials.
- Double-click the new PC to connect, and accept the certificate prompt the first time.
One thing to watch for: Windows App gives up on its certificate prompt after about 20 seconds and then shows a confusing error about an expired password (code 0x207). If that happens, connect again and answer the prompt right away. It appears as a sheet on the connection window, so it can hide behind other windows.
How to RDP into a Mac from Linux
FreeRDP is the most common RDP client on Linux, and most distributions package it. From a terminal:
xfreerdp /v:mac-mini.local /u:remote /dynamic-resolution
Replace mac-mini.local with your Mac’s address and remote with your ProRDP username. Some distributions name the FreeRDP 3 command xfreerdp3 instead. /dynamic-resolution lets the Mac’s desktop follow the size of your window.
How to RDP into a Mac from outside your home network
Don’t forward port 3389 on your router to your Mac. RDP ports open to the internet get scanned and attacked constantly, and it’s not worth the risk for any machine, Mac or PC.
Instead, connect through a VPN. If your router has a built-in VPN server, or you use a mesh VPN like Tailscale, connect to it first and then RDP into the Mac using its address on the VPN, just as if you were at home.
Troubleshooting RDP on a Mac
Why can’t I connect to my Mac with Remote Desktop?
Work through these in order:
- Is the server running? The General pane in ProRDP should say Listening on, not Stopped or Error. An error shows its reason underneath in red.
- Is the Mac awake? A sleeping Mac doesn’t answer on the network at all. Make sure Keep this Mac awake is set to Always.
- Is something blocking the port? If the macOS firewall or another firewall on your network is on, it has to allow incoming connections to ProRDP on port 3389.
- Are you using the right address? Copy it straight from the General pane to rule out typos or a changed IP address.
Why is my RDP session to a Mac showing a black screen?
Almost always, this means ProRDP doesn’t have the Screen Recording permission yet, or it was granted but ProRDP hasn’t been relaunched since. Check System Settings › Privacy & Security › Screen Recording, make sure ProRDP is switched on, then quit and reopen ProRDP.
How do I use Windows keyboard shortcuts on a Mac over RDP?
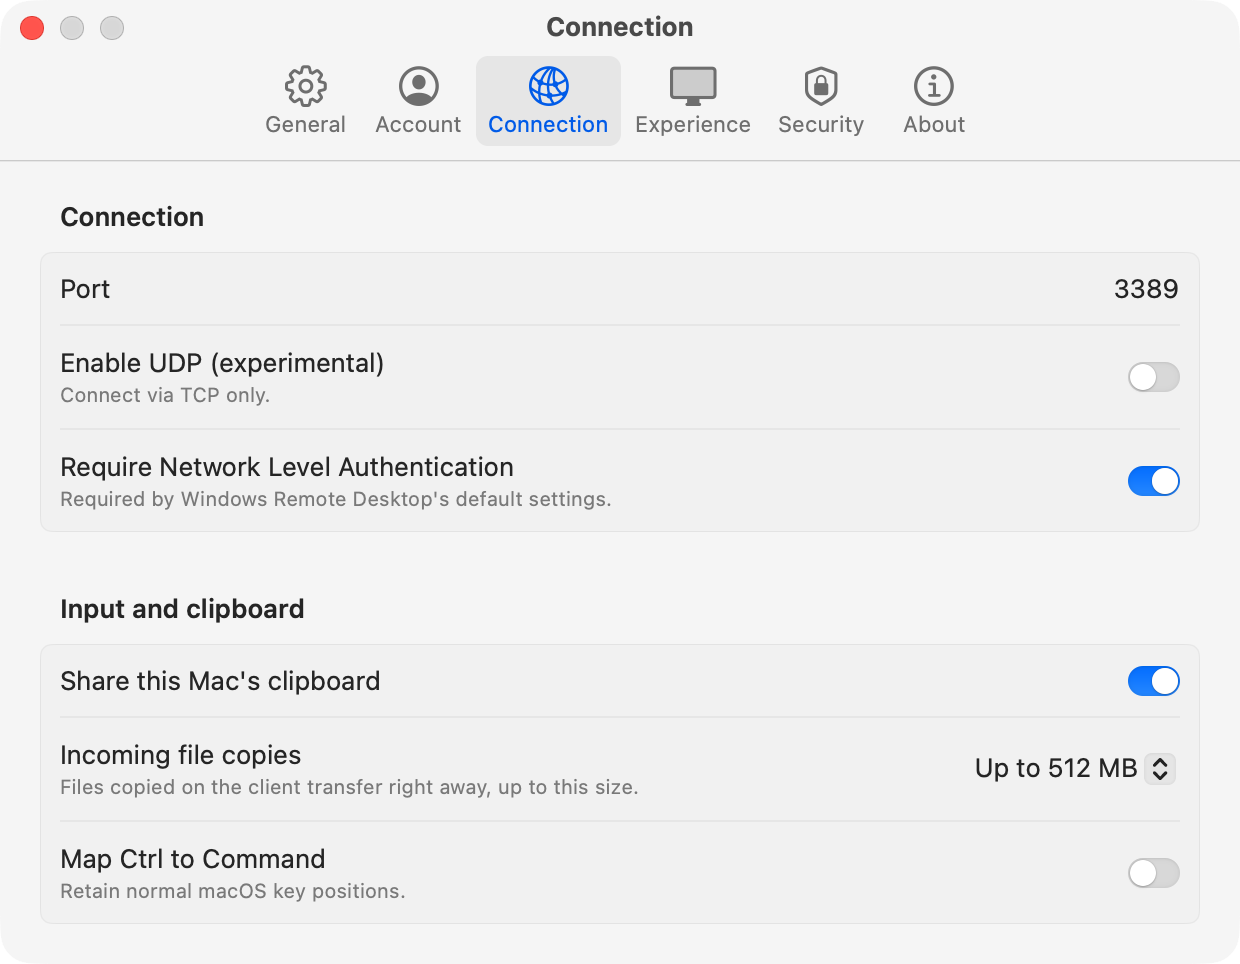
By default, keys keep their physical positions, so the Windows key acts as Command and Alt acts as Option. That means Ctrl+C arrives on the Mac as Control+C, which macOS doesn’t treat as Copy. If you’d rather use Windows shortcuts as-is, turn on Map Ctrl to Command in the Connection pane, and Ctrl+C, Ctrl+V, and Ctrl+Z will work the way you expect.
Why is there no sound when I RDP into my Mac?
With Share this Mac’s audio set to Automatic, ProRDP only sends audio to the client in Control mode, since in Extend and Mirror modes someone might still be using the Mac in person. Set it to Always in the Experience pane if you want audio in every mode, and make sure your client is set to play remote audio on your computer.
Is ProRDP safe to use?
ProRDP was built by an ex-Microsoft engineer to bridge the gap between macOS and Windows, after years of being frustrated with the lack of a native RDP server on macOS. It’s built to an enterprise-grade standard, with identity and infrastructure isolation keeping the ProRDP source code, website, and infrastructure secure and separate from day-to-day operations.
It is written 100% in native Swift code and does not rely on any third-party frameworks or libraries. ProRDP doesn’t have any telemetry, tracking, or data collection. All your usage stays local to your Mac, and it’s always free for home and personal use.
Can I copy and paste files between Windows and a Mac over RDP?
Yes. Copy and paste works in both directions for text, images, and files, using the standard RDP clipboard. Copy a file in File Explorer and paste it in Finder, or the other way around. The Connection pane controls the maximum size of files copied from the client, which defaults to 512 MB.
Is ProRDP free to use?
Yes, ProRDP is free for home and personal use, on as many Macs as you like. There are no artificial performance or feature limitations just to get you to subscribe to a higher tier.
Commercial licenses are on the way, with some cloud-based features and support options for businesses and power users. More details will come soon, but rest assured that no existing free features will be taken away, and paid tiers will only add features that require cloud infrastructure or ongoing support.
Wrapping up
macOS doesn’t come with an RDP server, but that doesn’t mean you’re stuck with VNC. With an RDP server installed on your Mac, connecting from Windows, another Mac, or Linux works the same way it always has for Windows PCs: type an address, sign in, and you’re there.
If you want to dig into every setting, the ProRDP docs cover them all. And if something doesn’t work the way this guide describes, please let me know in the prordp-app/release repository on GitHub.